Jewel’s

EC-6 ESL Lesson Plan Format – Science

Background Information

  1. Content Area: Science
  2. Topic: Forms of Energy
  3. Grade: 3rd Grade

Goals and Objectives

  1. TEKS:

Science- 3.6– Force, motion, and energy. The student knows that forces cause change and that energy exists in many forms. The student is expected to: (A) explore different forms of energy, including mechanical, light, sound, and thermal in everyday life.

Art- 3.2– Creative expression. The student communicates ideas through original artworks using a variety of media with appropriate skills. The student expresses thoughts and ideas creatively while challenging the imagination, fostering reflective thinking, and developing disciplined effort and progressive problem-solving skills. The student is expected to: (A) integrate ideas drawn from life experiences to create original works of art;

  1. Content Objective:

The students will identify the four forms of energy covered with 90% accuracy. The students will create a piece of art that represents a form of energy covered during the science lesson.

  1. ELPS:

3D- Speak using grade-level content area vocabulary in context to internalize new English words and build academic language proficiency.

  1. Language Objective:

The students will speak using the words, energy, mechanical energy, light energy, sound energy and thermal energy. The students will use the words and give examples of each with a 90% accuracy.

  1. Materials Needed:
  2. Technology Needed:

Pre-Assessment related to TEKS and Objectives

The teacher will present four pictures on the interactive white board. One of a bull dozer moving dirt, one of the sun, one of a hot spring steaming and one of someone listening to music. The teacher will tell the students that each picture represents a form of energy. She will ask the students what energy is and see if they can answer what energy each picture represents. This will tell the teacher what the students already know and what they do not know concerning the topic of energy.

Key Vocabulary:

  1. Energy
  2. Mechanical Energy
  3. Thermal Energy
  4. Light Energy
  5. Sound Energy

Jewel 1Instructional Procedures

This section must include the instructional procedures. Below is an example of what this would look like for an inquiry-based, 5E learning cycle.

  • Engage
    • The teacher will continue with the same pictures that were included in the pre-assessment but she will begin showing the children what each picture represents. She will uncover the words on the interactive white board to show that the bull dozer represents mechanical energy, the sun represents light energy, the hot springs that were steaming represents thermal energy and the person listening to the music represents sound energy. The teacher will allow the children to do a 90 second spark and talk with a partner about different ways to show the four forms of energy.
    • Purpose of the Engage is to:
      • Focus the student’s attention on the lesson
      • Create an organizing of the framework for the ideas, principles, or information that is to follow
      • Refer to prior learning
    • Explore
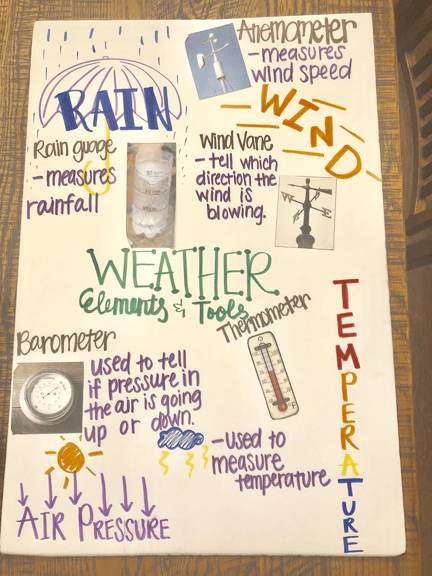
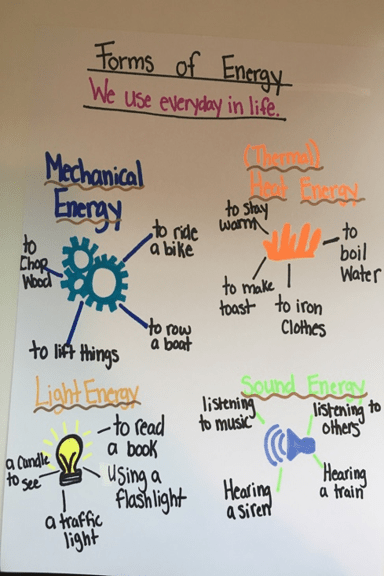
      • The teacher will complete an anchor chart like the one included below. She will guide the students learning in connecting each form of energy to everyday tasks. The teacher will add the tasks the students’ say to help increase the student knowledge about energy. The teacher will write out the new vocabulary as well as draw pictures on the anchor chart to help ELL’s as well as all students who need visual support. The teacher will encourage the children to talk about the forms of energy using the academic vocabulary.

Jewel 1

I created this anchor chart.

  • Explain

The student will complete a flip chart that will go in their science journals. The student’s will be expected to illustrate a picture representing each form of energy in their individual lives. Underneath each flap the students will write the definition of the energy form in a complete sentence. This activity will be finished as a whole group. The teacher will use the document camera and fill in the chart based on the children’s responses. The teacher will write down everyone’s idea but the students only have to write down their ideas.

Jewel 2

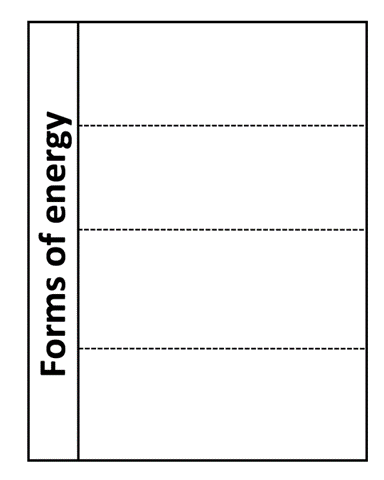
I created this flipbook.

  • Elaborate

For this section I will check for understanding of the topic by using Costas 3 levels of questioning.

Level 1- What are the four types of energy we learned about today? List two examples of each form of energy.

Level 2- Compare and contrast light energy with heat energy. Compare and contrast mechanical energy with sound energy.

Level 3- Create a situation where more than one form of energy is used. Illustrate a picture showing what is happening in the scenario created.

  • Re-Teaching
    • If I have students struggling with the concept of forms of energy, I will complete a whole group re-teach. I will have four cards labeled with words and an illustration of the four types of energy. I will have scenarios/situations listed on the other cards and we will find where each card belongs. This matching game will help the children have a deeper understanding of the different forms of energy because it will provide visual support.
  • Modifications
    • For children with an IEP or special needs I will abide by their plans and follow all modifications for each child.
    • For ELL’s at the speaking beginning level I wouldn’t require that they speak out loud in the class discussion or the creating of the anchor chart. I would however, encourage them and praise them for speaking. For the intermediate level, I would encourage more processing time when participating in group discussions and the completion of the flip book. For the advanced and advanced high levels, I would set them up to use the new vocabulary words learned, as well as when participating in the flip book activity I would encourage them to speak using the academic vocabulary words. I would also encourage the advanced and advanced high levels to speak in different parts of the lesson which would allow them more practice bit also model for the lower children.
  • Extensions
    • The children will have the choice to get on a computer and complete some forms of energy games on BrainPop. They may also illustrate a picture with the different forms of energy labeled. They will also have the option to read their individual books or complete a puzzle independently.


Assessment

  • Evaluate
    • For the assessment, the teacher will look over the children’s completed flip books and monitor their understanding over the different forms of energy. However, the teacher will complete a mini assessment for this lesson using the individual whiteboards. Each child will have a board and a marker, the teacher will ask the children to write down the form of energy that provides heat as well as give 3 examples. The teacher will then ask them to write down the form of energy that is needed to ride a bike. The teacher will ask them to write down 3 reasons that light energy is needed and how we use it every day. Lastly, the teacher will ask the students to define sound energy and provide an illustration of how it is used.
    • The teacher will be taking anecdotal notes during the whiteboard activity and mastery will be measured at 95%.
    • The students display their knowledge and understanding of the different forms of energy by completing the lip book. The children also worked cooperatively during the flip book activity.
    • The students listened and followed directions during the re-teach matching game as well as the mini assessment

Summary for the Students of What Has Been Learned

  • Closure
    • The teacher will bring the class back together and start talking about the vocabulary learned, and how we can determine when different forms of energy are being used. However, there are some events when more than one form of energy is being used. As a class, we will discover some of those events, such as when you kick a soccer ball, you use mechanical energy but the sound that is created when the ball meets the foot is sound energy. The teacher will also ask the students to rate their learning with a thumb up, thumb horizontal or a thumb down. This final check will let the teacher know where the students stand.

References

Flip Into Success ELPS at a Glance. (2009). El Saber Enterprises.

Texas Education Agency, 2010. TEKS. Retrieved from: http://ritter.tea.state.tx.us/rules/tac/chapter112/ch112a.html

Group Lesson


Grade 4
Topic Question

What is weather? How is weather different in Arlington, Texas compared to Russia? How can we measure weather?  

TEKS

(8) Earth and space. The student knows that there are recognizable patterns in the natural world and among the Sun, Earth, and Moon system. The student is expected to:

(A) measure, record, and predict changes in weather.


NSTA

ETS1.A:  Defining and Delimiting Engineering Problems

Objectives

  • Students will summarize different changes in weather as well as how to measure weather.
  • Students will explore how weather patterns are different in the United States vs. Russia.
Materials

  • Anchor Chart
  • Scissors
  • Glue
  • Science interactive notebook
  • Weather tools activity page
Phases of the 5E model Questions
Engage.

Ask questions about objects, organisms, and event in the environment.

Popsicle stick activity- Conduct a whole group pre-assessment asking “What are the elements of weather as well as the measurement tools.” We will use Kahoot and have the students use popsicle sticks instead of their individual devices to answer the questions.  This will be a pre-assessment, so we can know where each student is academically.
Explore.

Ask questions to gather evidence to answer the question posed.

The teacher will show the students an anchor chart to review the materials that we were able to see in the video. The anchor chart will include the terms: wind, rain, air pressure, wind vane, thermometer, barometer, anemometer, rain gauge. The anchor chart will also have visuals that will help each student connect the tool with the purpose of the tool.

Group 2

Explain.

Ask questions to use new knowledge and observable evidence to construct scientific explanations and answer initiating questions.

The teacher will then have an interactive wall activity that shows the tools and the uses. The students will be handed a card and they are expected to place the tools in the correct places. This will also help the teacher know if the students “got it”.
Elaborate.

Ask questions to apply new understandings to new problems.

  1. Marco Polo Weather game

We will use technology integration and the use of an iPad and the app Marco Polo Weather. The students will be able to change the weather and see how the background changes (the sky, sun, snow, rain etc.) as well as the characters clothes will change. This will help the student develop a deeper understanding of weather and how humans adapt to all weather.

Evaluate.

Ask questions to assess developing understandings and inquiry skills.

  • Graphic Organizer

The final evaluation for this lesson will be the graphic organizer flip book. The students will cut each paper out and glue the paper in their interactive notebooks. The students will be expected to correctly identify each weather instrument under each flap. Group

Mackenzie’s

EC-6 ESL Lesson Plan – Science

Background Information

  1. Content Area: Science
  2. Topic: Friction
  3. Grade: 4th grade


  1. Goals and Objectives
  2. TEKS 4.6 (D) design a descriptive investigation to explore the effect of force on an object such as a push or a pull, gravity, friction, or magnetism.

TEKS 4.2 (C) construct simple tables, charts, bar graphs, and maps using tools and current technology to organize, examine, and evaluate data;

  1. Content Objective:

The fourth-grade science students will design a bar graph to represent the relationship between the friction and the distance of a toy car using the results of the experiment.

  1. ELPS:

ELPS 74.4 (c) 3 (E) share information in cooperative learning interactions

  1. Language Objective:

The fourth-grade science students work cooperatively in small groups while sharing learned knowledge to create the bar graph.

  1. Materials Needed:
  • Graph Sheet (for each student) (Appendix A)
  • Aluminum foil sheet (one per group)
  • Toy car (one per group)
  • Carpet piece (one per group)
  • Tile (one per group)
  • Bubble wrap (one per group)
  • Design a Racetrack! (for each student) (Appendix B)
  1. Technology Needed:
  • Projector


  1. Pre-Assessment related to TEKS and Objectives

The students will be asked to tell what friction is in their own words. Then they will be asked to predict which material will allow the car to travel the furthest using with the most friction. They will put the four materials in order from most friction to least as a class. We will post this on the wall and compare this at the end of the lesson. (This will be done after the hook.)


  1. Key Vocabulary:
Friction Toy Car Bubble Wrap
Aluminum Foil Carpet Tile
Distance Material Associations
  1. Instructional Procedures
  • Engage

The teacher will write the word “FRICTION” on the board and hold up a toy car. Then ask the students how to explain the word and toy car are associated. There are guiding questions to lead them in the right directions, such as “does the car always go the same distance on any material?” Why or why not?

  • Explore
    • The students will be put into groups and given their materials for this experiment.
    • Teacher Modeling: The teacher will model how to set up the experiment by having an example for the students to follow. The teacher will push a toy car across the aluminum foil. The teacher will take notes on how far the car traveled using this material.
    • Guided Practice: The teacher will complete another example, but this time she will have a student come up to do the movements with the teacher’s guidance.
    • Checking for Understanding: The students will do this with all four materials as a group. When they finish driving the car across all four materials, then the students will be completing the graph to show the distance that the car traveled.
  • Explain
    • The students will go around the room and compare their graphs with other groups’ graphs for 2 minutes. Then we will discuss this as a class. The teacher will then clarify any misconceptions or correct any reoccurring mistakes.
    • Checking for Understanding: The teacher will ask how students will do with other materials at their homes. Will a car going across a kitchen counter or grass create more friction?
  • Elaborate
    • The students will create a racetrack where they choose which materials they would like to use for the track itself. They would have to choose one of the four materials for the track or a mix of the materials. They will have to include a drawing of the car on the track, the stands, the track, the type of material that they used for the track, and the reason that they chose this material for the track. (Appendix B)
  • Re-Teaching
    • I would have the students group multiple pictures printed out with a possible graph to describe how far the car would travel, similar to the graph that they completed in class. The students will have to match the material to the graph. (Appendix A)
  • Modifications
    • We could do another example in class if the students do not understandably we go.
    • For ELs I would include sentence stems, visual aids, a picture of the materials with their name labeled across them, and the written questions to allow them to see and hear the information.
    • Include images along the x-axis along with the listed materials.
  • Extensions
    • The students will compare two different materials that they could try to drive a toy car over to compare materials. Some examples could be a piece of paper, notebook, desk, concrete, playground wood chips, basketball court, rug, etc. They could do the same experiment wi other materials that could be found around the school.
    • The students could measure the distance exactly to be more exact with their graphs.


  1. Assessment
  • Evaluate
    • During the lesson, the teacher can assess the students by examining their graphs as they create them. The teacher can see how the students understood the association between traveled distance and friction.
    • If the students were engaged constantly and actively participating in the group conversations, then they will have a positive assessment for the materials. If they contribute to the conversations with accurate information, then the teacher can assume that they understand the TEKS, but if they are confused or struggling the teacher needs to contribute more information or guidance.
    • The teacher can see the students’ individual assessments by checking the racetrack assignment to see if they were able to follow the directions and explain the reasoning for choosing their materials. If the students was able to choose a material and accurately describe the material in their explanation, then the student has mastered the content. If not, then the teacher needs to reteach the lesson.


  1. Summary for the Students of What Has Been Learned
  • Closure – We will have the students group by materials. The students who chose aluminum foil will be in a group, the students who chose carpet together, etc. Then as a class we will discuss the pros and cons of these materials. The teacher will make sure to emphasize the relationship between friction and distance.


References

Texas Education Agency, 2010. TEKS. Retrieved from:

http://ritter.tea.state.tx.us/rules/tac/chapter112/ch112a.html


Texas Education Agency, 2010. ELPS. Retrieved from: http://ritter.tea.state.tx.us/rules/tac/chapter074/ch074a.html


Appendix A

Graph Sheet

Mac 1

Appendix BMac 2

Ashley’s

EC-6 ESL Lesson Plan– Science

  1. Background Information
  2. Content Area: Science
  3. Topic: Weather Tools
  4. Grade: 2nd Grade

Goals and Objectives

  1. TEKS

(4) Scientific investigation and reasoning. The student uses age-appropriate tools and models to investigate the natural world. The student is expected to:

(A) collect, record, and compare information using tools, including computers, hand lenses, rulers, plastic beakers, magnets, collecting nets, notebooks, and safety goggles or chemical splash goggles, as appropriate; timing devices; weather instruments such as thermometers, wind vanes, and rain gauges; and materials to support observations of habitats of organisms such as terrariums and aquariums; and

(8) Earth and space. The student knows that there are recognizable patterns in the natural world and among objects in the sky. The student is expected to:

(B) identify the importance of weather and seasonal information to make choices in clothing, activities, and transportation; and

  1. Content Objective:

Students will be able to accurately identify all four weather measuring tools and describe what they are used for.

 ELPS:

(5)  Cross-curricular second language acquisition/writing. The ELL writes in a variety of forms with increasing accuracy to effectively address a specific purpose and audience in all content areas. ELLs may be at the beginning, intermediate, advanced, or advanced high stage of English language acquisition in writing. In order for the ELL to meet grade-level learning expectations across foundation and enrichment curriculum, all instruction delivered in English must be linguistically accommodated (communicated, sequenced, and scaffolded) commensurate with the student’s level of English language proficiency. For Kindergarten and Grade 1, certain of these student expectations do not apply until the student has reached the stage of generating original written text using a standard writing system. The student is expected to:

(B)  write using newly acquired basic vocabulary and content-based grade-level vocabulary;

 4. Language Objective: Students will complete a graphic organizer by accurately writing the names of the tools and providing their appropriate descriptions.

5. Materials Needed: Slide show, graphic organizer handout, headbands, index cards

6. Technology Needed: Projector

  1. Pre-Assessment related to TEKS and Objectives

I will engage in prior knowledge by referring to a book the students have recently read in class, Superstorms by Seymour Simon. Then, I will ask the class if they have ever heard of weather instruments and call on students to share what they know.

  1. Key Vocabulary:


  1. Thermometer
  2. Rain gauge
  3. Wind vane
  4. Anemometer
  5. Precipitation


  1. Instructional Procedures


  • I will call on students to name weather instruments they can recall from the slideshow.
  • To give a visual, I will display a weather station beneath the projector and call on students to identify and describe the four weather instruments.
    • I will say the name of each weather instrument and ask the students to repeat it back to me.
  • Purpose of the Engage is to:
    • Focus the student’s attention on weather and the tools we use to measure weather.


  • Explore
    • The students will work in partners and participate in an activity where they will be using headbands and premade index cards that have each of the four instruments represented on them. (The name of the instrument and an image will be on the front of the card, and its description will be on the back.) The teacher will draw sticks to pair students up.
      • Each group will have one plastic headband, four index cards and a card with question examples and sentence stems.
      • The students will take turns guessing what card is on their forehead by asking their group members “yes or no,” questions.
      • Once the student correctly guesses what tool they have, they will take it off of their forehead and read the description of the tool on the back of the card to their partner. When each tool is covered, the activity is completed and can be repeated a second time.
        • If groups finish before their peers, they will quiz each other with the cards by either taking turns reading the descriptions and asking their partner to name the instrument, or vice versa.
      • Teacher Modeling: The teacher will explain the instructions of the activity and set expectations.
        • The teacher will model how to place the headband on their head, how to place the card in it and use the sentence stems provided to ask questions to guess what their card says.
          • Some examples:
            • Do I measure_________(precipitation, wind, temperature)?
            • Can I be used during the __________(fall, winter, summer, spring) season?
          • “The headbands should be handled appropriately, not as a whip to swing in the air or hit anyone. Also, the cards should be taken care of and not thrown around because they can hit someone in the eye or give someone a papercut.”
        • Guided Practice: The teacher will be walking around and assessing students by checking to see how quickly they are able to guess their instrument and listen to see what type of questions they are asking to identify their level of understanding. The teacher will give guidance if needed.


  • Explain
    • Once the activity is complete, the students will each receive a weather instrument graphic organizer to complete individually. At this time, the students will be told to “put up their office,” and be reminded not to speak to one another.
      • Images of the instruments are provided for them on the handout, the students are to write the tool’s name and explain what it does.
      • A word bank of the instrument names will be projected on the screen for reference
        • Students will turn in the graphic organizer when they are finished.
      • Checking for Understanding:
        • Bloom’s Taxonomy Lower-level thinking question:
          • What are the names of the four weather instruments we learned about today?
        • Bloom’s Taxonomy Intermediate-level thinking question:
          • How is a wind vane different from an anemometer?
        • Bloom’s Taxonomy Higher-level thinking question:
          • If I needed to decide whether or not I should grab a jacket tonight, describe what weather tool I might use to help me make my decision? Why?
        • Elaborate
          • The teacher will facilitate a class discussion over the use of these tools in everyday life and guide students to make real life connections by describing different occupations that rely on these tools and/or by sharing personal experiences.
        • Re-Teaching
          • In small groups or as an entire class, students will watch video animations of each tool and will need to turn and talk to another classmate and describe what they saw. Next, the teacher will say the name of the tool, and the students will repeat the name back to the teacher. After that, the teacher will model and guide the students to draw the tool and write down its name. Then, the teacher will give a short description of what the tool does, and the students will turn and tell a partner what it does. This process will continue until all four of the tools are covered. Also, at this time, students may ask questions.
            • Then students will receive a handout with the names of the instruments and their descriptors in different boxes, which they will cut out. Then the students will work individually to accurately match the cards. The teacher will walk around and check each student’s work.
              • Once the cards are matched correctly, each student will complete a handout where they must draw a line to match the name of the tools to their description without using their study cards.
            • Modifications
              • Special needs/IEP: Pre-made study cards with labels and images printed in color. Assistance from an interventionalist or Teacher’s aide. Personal printed copy of slide show. Provided with access to video animations with headphones to hear audio. Provided with cut-and-paste tool name and definition cards to be placed into an organizer.
              • Beginners: Pre-made study cards with labels and images printed in color. Assistance from an interventionalist or Teacher’s aide. Provided with cut-and-paste tool name and definition cards to be placed into an organizer.
              • Intermediate: Work with a partner.
              • Advanced English learners (ELs): Option to work with a partner.
            • Extensions
              • How might you extend this lesson for children of more advanced abilities?
                • These students will create comic strips that will identify at least one weather element, one weather tool and what clothes are appropriate to wear in those conditions.


  1. Assessment
  • EvaluateStudents will be assessed by their completion of their graphic organizers. Each tool should be appropriately named and defined (spelling does not count, although a word bank of tool names will be provided.)
    • What did the students do during this lesson to let you know they had met the objectives stated above?
      • Students will have completed their graphic organizers with 100% accuracy.
    • What were the behaviorally/observable ways that the students met the objectives for this lesson?
      • Students will be actively participating in the activities and class discussions.


  1. Summary for the Students of What Has Been Learned
  • Closure“Today we discussed what weather instruments we can use to measure weather elements such as precipitation, wind and temperature. These tools can also help us understand how we should dress for the day and help us predict what we might experience throughout the day as well. Since weather is something we cannot control, it is important for us to understand how to be prepared for it and these tools can help us do that.”


Ashley's Chart

 References

English Language Proficiency Standards. Chapter 74, Curriculum Requirements.

Subchapter A. Required Curriculum. Chapter 74.4, c, 2,i

Texas Essential Knowledge and Skills for Social Studies. Subchapter A. Elementary,

Chapter 112.13, b, 4, A. Retrieved from http://ritter.tea.state.tx.us/rules/tac/chapter112/ch112a.html#112.13

Texas Essential Knowledge and Skills for Social Studies. Subchapter A. Elementary,

Chapter 112.13, b, 8, B. Retrieved from http://ritter.tea.state.tx.us/rules/tac/chapter112/ch112a.html#112.13

Science Song

Rain gauge measures rain, rain, rain

Thermometer measures temperature, temperature, temperature

Anemometer measures wind, wind, wind

Pyschrometer measures humidity, humidity, humidity

Wind vane measures wind direction, wind direction, wind direction.
Sang to the tune of London Bridge is Falling Down

Ashley’s

Science Autobiography

  1. What were your thoughts then?

I feel like a good science candidate should have a personal interest in science because without this personal passion the students will not be motivated to learn, and it could have a negative effect.

  1. What are your thoughts now?

I still feel the same way.

  1. If your thoughts changed, why have they changed?

My thoughts have not changed because from our own class experiences this semester, I was able to see Dr. Yoon’s excitement because she would dress-up and bring us cultural snacks as well. This made class fun and interesting. Also, the use of her personal photos and in-class science activities kept things interactive and kept my interest. Science can be really hard because there are a lot of terms and vocabulary, but when the teacher is enjoying it, it is easier for the students to want to get involved.

Science in Your Classroom (5 pts)

  1. What is your personal philosophy for the teaching of science?

I personally believe that science is really important because it truly is the study of life and all that surrounds us in this world. For this reason, I think that the teachings should be presented in a way that is engaging and memorable. Since science is based upon theories and factual information, the material should be taught in a way that inspires or motivates learners to want to know more. The teacher should incorporate their own experiences and share stories with their students whenever possible. I believe that it is important for students to make life-connections because it will help them understand the importance of science and hopefully motivate them to explore more on their own.

  1. How do you plan on incorporating science into your future classroom?

In my future class, I will incorporate science by using various resources and technology. I personally enjoy hands-on science experiments and like watching video animations as well. Also, I will bring in physical objects for my students to see and touch. I do not want my teachings to be lectures where my students are not moving around or not actively involved because science is really cool and a lot of fun!

  1. How confident are you in your ability to teach science in the future? Support your philosophy with readings, textbook, articles, class discussions, and other sources.

I am still learning; however, I have an interest in teaching science and am excited about it. I have learned a lot during my first placement with my CT who teaches science to all of fifth grade. She uses an interactive notebook and always conducts fun science experiments and activities. I have learned a lot in my time observing her. It is really interesting how many different ways a teacher could use an interactive notebook to teach science because it is hands-on and requires students to constantly be engaged and actively participating. I am still learning the material and building up my content knowledge, though I feel confident in myself to do the research I need to in order to do so.

Reflection over the Course (5 pts)

  1. How has this course helped you to develop your teaching philosophy and/or ability to teach science?

I liked how Dr. Yoon always modeled the 5E lesson planning each day in class. This helped me see what this looks like and has taught me different ways I could implement these things. I observed how fun it can be to teach science, no matter how old your students are.  Also, I have seen many different ways that I can integrate cultural aspects into my teachings.

  1. What recommendations would you make to improve the course in the future?

I noticed how some classmates do not pay attention to groups when they are presenting their lessons. I think that if the groups that were not presenting had to evaluate their peers, then they would be required to participate and be involved when groups are teaching them. This could also be good practice for grading student performance too!